To use dog nail clippers, hold your dog’s paw and cut small portions of the nail tip at a time, avoiding the quick (the pink part inside the nail). Make sure to use sharp, high-quality clippers and have styptic powder or cornstarch nearby in case of bleeding.
Having well-trimmed nails is essential for your dog’s overall health and comfort. Long nails can cause discomfort and pain, leading to an altered gait and potentially causing joint and posture problems. Regularly trimming your dog’s nails helps maintain their mobility and reduces the risk of injury.
However, the thought of this task can be intimidating for pet owners. In this guide, we will show you the step-by-step process of using dog nail clippers with confidence and care. By following these instructions, you can ensure a positive experience for both you and your furry friend.
Preparing For Nail Clipping: Set Yourself Up For Success
Trimming your dog’s nails is an essential part of their grooming routine. However, it can be a challenging task if your furry friend is not comfortable with it. To ensure a smooth and stress-free experience, it’s crucial to set yourself up for success by preparing ahead of time. In this article, we will explore how to choose the right tools and introduce the clippers gradually to familiarize your dog with them.
Choose The Right Tools: Selecting The Perfect Dog Nail Clippers
When it comes to trimming your dog’s nails, having the right tools is of utmost importance. The choice of dog nail clippers can make a significant difference in the ease and safety of the process. Consider the following factors when selecting the perfect clippers:
- Size: Ensure the clippers are appropriate for your dog’s size. Small clippers are suitable for small breeds, while large clippers are better suited for larger dogs.
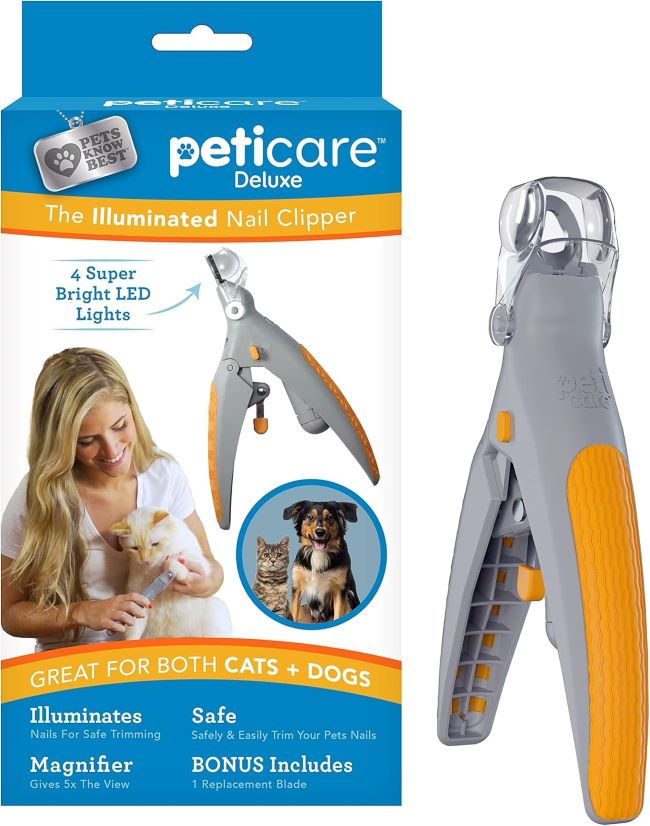
- Style: There are different styles of nail clippers available, such as guillotine-style, scissors-style, or grinder-style. Research and choose the style that you feel most comfortable using and that best suits your dog’s nails.
- Quality: Invest in high-quality clippers that are durable and sharp. Dull clippers can cause discomfort and may even split the nails.
By selecting the appropriate dog nail clippers, you’ll ensure a smoother and less stressful nail trimming experience for both you and your beloved pet.
Introduce The Clippers Gradually: Familiarizing Your Dog With The Nail Clippers
Before jumping straight into nail clipping, it’s essential to familiarize your dog with the nail clippers gradually. This helps in reducing anxiety and increases the chances of cooperation from your furry companion. Here are some steps to follow:
- Positive association: Introduce the nail clippers in a positive light. Begin by letting your dog sniff and inspect the clippers while offering treats or praise. This will create a positive association with the clippers.
- Touch their paws: Get your dog accustomed to having their paws touched. Gently hold and massage their paws, making it a pleasant experience for them.
- Practice handling: Gradually start handling your dog’s paws as if you were trimming their nails. This will help them get used to the sensation and reduce any apprehension.
- Simulate clipping: Begin by mimicking the clipping motion without actually cutting the nails. This will help your dog understand the process and get comfortable with the clipper’s presence.
By following these steps to familiarize your dog with the nail clippers, you’ll create a positive and stress-free environment for nail clipping sessions.
Step 1: Getting Your Dog Comfortable And Calm
To successfully use dog nail clippers, the first step is to ensure your dog is calm and comfortable. This can be achieved by creating a soothing environment and using gentle techniques to help your furry friend relax.
Create A Safe And Peaceful Environment: Setting The Stage For A Positive Experience
Before attempting to clip your dog’s nails, it is crucial to create a safe and peaceful environment. By setting the stage for a positive experience, you can help your furry friend feel more at ease during the nail clipping process.
Start by finding a quiet area in your home where you can comfortably restrain your dog. This could be a familiar room or a designated space that your dog finds relaxing. Remove any potential distractions like loud noises or other pets to ensure your dog’s undivided attention.
Additionally, make sure you have good lighting to clearly see your dog’s nails. Natural daylight or a bright, well-lit room can be helpful.
To further enhance the environment, consider playing soft, calming music or using aromatherapy. Certain scents like lavender or chamomile can help promote relaxation for both you and your dog.
Gentle Handling Techniques: Building Trust And Relaxation
The next step is to use gentle handling techniques to build trust and relaxation with your dog. Your furry friend should feel safe and secure in your presence during the nail clipping process.
Start by sitting or kneeling near your dog, maintaining a calm and relaxed posture. Avoid any sudden movements or actions that may startle your dog.
Begin by gently stroking your dog’s paws and nails, allowing them to become accustomed to the sensation. Use a soothing and reassuring voice to praise and reassure your dog throughout the process.
If your dog shows signs of nervousness or discomfort, take a step back and give them a break. Patience is key in building trust and ensuring a positive experience for your pet.
Desensitization Training: Teaching Your Dog To Associate Nail Clippers With Positive Rewards
Desensitization training is an effective way to help your dog associate nail clippers with positive rewards. By gradually introducing the clippers and rewarding your dog for calm behavior, you can help alleviate any fear or anxiety associated with the tools.
Start by simply showing your dog the nail clippers and praising them for remaining calm. Offer treats or rewards as positive reinforcement for their cooperation.
Over time, slowly progress to touching your dog’s paws with the clippers, always rewarding them for remaining calm. Gradually increase the duration of contact until your dog feels comfortable with the clippers in close proximity to their nails.
Remember to be patient and never force your dog into the process. It may take several sessions before your dog feels completely at ease with nail clipping.
Step 2: Identifying The Quick And Clipping Length
To effectively use dog nail clippers, step 2 involves identifying the quick and clipping length. This helps ensure you trim the nails safely without causing discomfort or injury to your furry friend.
Understanding The Anatomy Of A Dog’s Nail: The Quick And The Keratin
Before you begin the nail clipping process, it’s crucial to understand the anatomy of a dog’s nail. A dog’s nail consists of a tough outer layer called keratin and a sensitive inner part known as the quick. The quick is comprised of blood vessels and nerve endings, and if cut, it can cause discomfort and bleeding for your furry friend.
In order to perform a successful and pain-free nail trimming, you must be able to identify the quick, knowing where it starts and ends.
Tips For Identifying The Quick: Ensuring A Pain-free Nail Clipping Session
Identifying the quick can be a task that requires a bit of practice and caution. Here are some tips to help you locate the quick and ensure a comfortable experience for your canine companion:
- Observe the nail color: The quick is typically visible in light-colored nails as a pinkish or darker area. However, in dark-colored nails, it may be more challenging to see. In such cases, proceed with extra caution.
- Illuminate the nail: Use a flashlight or a source of bright light to shine through the nail. This will help you spot the quick more easily.
- Start with small cuts: To avoid accidentally cutting into the quick, begin by making small, incremental cuts. This allows you to gradually approach the desired length without causing any discomfort.
- Seek professional advice, if needed: If you’re still unsure about identifying the quick, consult a professional dog groomer or a veterinarian. They can provide guidance and demonstrate proper techniques to help you confidently locate the quick.
Determining The Appropriate Clipping Length: Short Vs. Long Nails
The appropriate clipping length for your dog’s nails depends on their overall health, lifestyle, and specific breed. Here’s a breakdown of the differences between short and long nails to guide you:
| Short Nails | Long Nails |
|---|---|
|
|
When clipping your dog’s nails, your goal should be to maintain a length that doesn’t touch or extend beyond the floor when your dog stands. Keep in mind that regular trimming is necessary to prevent nails from becoming too long.
Credit: petcontrolhq.com
Step 3: Proper Holding And Positioning Techniques
Learn how to use dog nail clippers with proper holding and positioning techniques. This step is essential for ensuring a safe and effective trimming process for your furry friend’s nails.
Hold It Right: Grip Techniques For Nail Clippers
When it comes to using dog nail clippers, proper holding techniques are crucial for both your comfort and your dog’s safety. Holding the clippers correctly will allow for better control and precision while minimizing the risk of accidents. Here are a few grip techniques to ensure you hold the clippers right:
- The Standard Grip: Hold the clippers as you would hold a pair of scissors. Place your thumb on one handle and your fingers on the other handle, forming a comfortable grip.
- The Reverse Grip: For those with smaller hands or who prefer an alternative grip, you can hold the clippers with your thumb on the handle that your fingers would typically go and your fingers on the opposite handle.
Both grip techniques offer stability and control, allowing you to maneuver the clippers with confidence while trimming your dog’s nails.
Positioning Tips For Optimal Control And Safety
In addition to the proper grip, positioning the clippers correctly is equally important. Proper positioning ensures optimal control and helps prevent accidental injury to your dog’s nails. Consider the following tips for effective positioning:
- Find a Comfortable Spot: Choose a well-lit area where you and your dog can feel comfortable. This will ensure both of you are relaxed and less likely to make mistakes during the process.
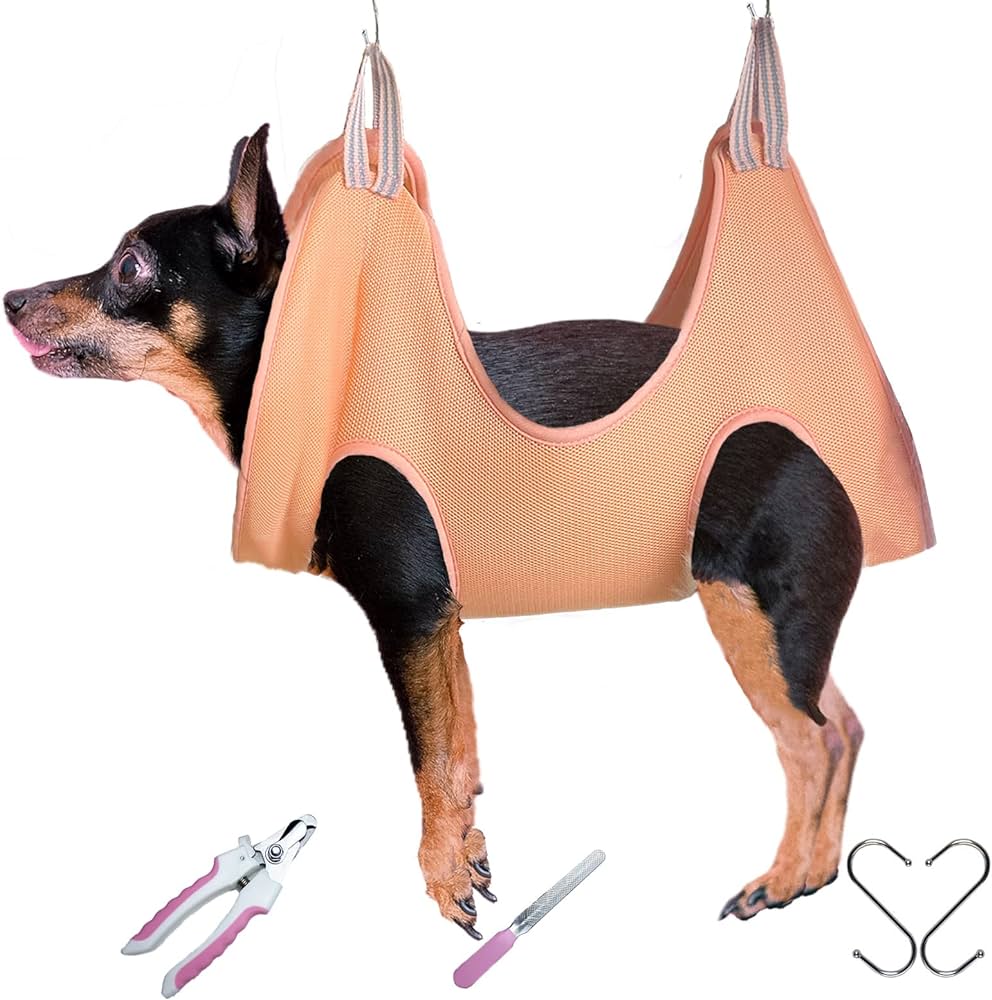
- Secure Your Dog: Gently but securely hold your dog’s paw to prevent any sudden movements. This helps maintain control over their nails while also keeping them safe.
- Determine the Appropriate Angle: Look for the natural curve of your dog’s nail and position the clippers accordingly. Align the blades parallel to the curve, aiming to cut just the tip without getting too close to the quick.
- Take Small Snips: It’s always better to make small, gradual trims rather than trying to clip off a large portion in one go. This approach reduces the risk of accidentally cutting into the quick and causing pain or bleeding.
By following these positioning tips, you’ll have better control over the clippers and minimize the likelihood of accidents or mishaps.
Step 4: Clippers At The Ready: Clipping Safely And Effectively
Using dog nail clippers can seem daunting, particularly if you’ve never done it before. However, with the right approach and a little practice, you’ll soon become a pro at keeping your furry friend’s nails neat and tidy. In this step, we’ll cover some important considerations and techniques for clipping your dog’s nails safely and effectively.
Start Slow And Steady: Building Confidence With Gradual Clipping
It’s essential to approach nail clipping with patience and a calm demeanor. Dogs can sense anxiety, so it’s important to stay relaxed throughout the process. Begin by introducing the clippers to your dog and allowing them to sniff and inspect the tool. This helps them become familiar with it and reduces any apprehension they may have.
When starting out, aim to trim only a small portion of the nail to avoid cutting into the quick, which is a sensitive area that can cause bleeding. Gradually increase the amount you trim with each session as your dog becomes more comfortable. Remember to reward your furry friend with treats and praise after each successful nail trimming session. This positive reinforcement reinforces good behavior and makes the experience more enjoyable for both of you.
The Proper Technique: Angle And Pressure For Clean Cuts
The technique you use to hold and operate the clippers is crucial for clean, safe cuts. Hold your dog’s paw gently, making sure you have a firm grip that offers stability. Position the clippers at a 45-degree angle, carefully avoiding the quick. Take small cuts at a time, being mindful of your dog’s reaction and stress levels.
When using guillotine-style clippers, squeeze the handles firmly but not too forcefully to avoid injury. For scissor-type clippers, ensure your hand placement allows for proper leverage and control. Always remember to cut in a straight line and avoid angled cuts as they can cause uneven trimming or injury.
Dealing With Difficult Nails: Special Considerations For Thick Or Curved Nails
Some dogs have thick or curved nails, which require extra attention during the clipping process. To tackle these nails, it’s important to invest in appropriate clippers designed for thicker nails, such as plier-style or rotary clippers. These types of clippers provide more power and control, making it easier to trim tough nails.
Additionally, using a grinding tool or nail file can help smooth and shape thick or curved nails after trimming. The grinding tool allows you to slowly file away excess length and create a smoother edge. Be cautious not to apply too much pressure or hold the tool in one place for too long, as it can generate heat and cause discomfort.
Remember, patience and practice are key when it comes to mastering the art of dog nail clipping. By following these tips and gradually building your dog’s confidence, you’ll be able to maintain their nails in tiptop shape, promoting a healthier and happier pup!
Step 5: Aftercare And Post-clipping Care
Discover step 5 of the dog nail clipping process: aftercare and post-clipping care. Learn how to properly take care of your furry companion’s nails for their overall wellbeing.
Once you have successfully trimmed your dog’s nails, it’s essential to provide aftercare and post-clipping care to ensure their paws stay healthy and comfortable. Follow these steps to smooth rough edges, treat and prevent nail injuries, and reward your pup for a positive nail-clipping experience.
Smooth It Out: Techniques For Smoothing Rough Edges
After using the dog nail clippers, your furry friend’s nails may have some rough edges that need to be smoothed out. Rough edges can cause discomfort to your dog and can potentially snag on fabrics or surfaces. Here are a few techniques to smoothen those rough edges:
- Sanding: Use a dog nail file or a regular emery board to gently file down any sharp or jagged edges. Make sure to maintain a steady grip on your dog’s paw and use short, gentle strokes to prevent over-filing.
- Grinding: If you prefer an alternative to manual filing, consider using a nail grinder designed for dogs. These electric devices have a rotating grinder that can efficiently grind down your dog’s nails, leaving them smooth and rounded. Remember to introduce the grinder gradually to your dog to avoid causing anxiety or discomfort.
Treating And Preventing Nail Injuries: Providing First Aid And Avoiding Future Accidents
Although accidents can happen during nail clippings, it’s important to be prepared to provide immediate first aid if your dog happens to get injured. Follow these steps to treat and prevent nail injuries:
- Apply pressure: If your dog starts to bleed due to accidental cutting into the quick, apply gentle pressure with a clean cloth or cotton ball to stop the bleeding. Hold the pressure for a few minutes until the bleeding subsides.
- Styptic powder: Keep styptic powder or a styptic pencil on hand to help stop bleeding. These products contain antiseptic and coagulant properties that can aid in the clotting process.
- Prevent accidents: To avoid nail injuries in the future, be cautious when selecting the appropriate nail clippers for your dog’s size and breed. Additionally, ensure proper lighting and a calm environment while clipping your dog’s nails to minimize any sudden movements that could lead to accidents.
Rewarding And Praising Your Pup: Reinforcing Positive Association With Nail Clipping
Nail clipping can be a stressful experience for some dogs, especially if they’ve had negative associations in the past. By reinforcing positive behavior and providing rewards, you can create a more pleasant experience for your furry friend. Here’s how:
- Treats and praise: Offer your dog small treats or verbal praise before, during, and after each nail clipping session to make them feel more comfortable. This positive reinforcement will help your dog associate nail clipping with something enjoyable.
- Take breaks: If your dog becomes anxious or restless during the process, take short breaks and provide a calming environment. This will help alleviate any stress or anxiety they may feel.
- Consistency: Maintain a regular nail clipping schedule to help your dog become familiar with the routine. By consistently reinforcing positive experiences, nail clipping will become less intimidating over time.
Frequently Asked Questions Of How To Use Dog Nail Clippers?
How Do You Cut A Dog’s Nails For Beginners?
To cut a dog’s nails as a beginner, follow these steps: 1. Use sharp dog nail clippers for precise cuts. 2. Gradually introduce the clippers to your dog to minimize stress. 3. Trim a small portion at a time, avoiding the quick (sensitive area).
4. If unsure, seek guidance from a veterinarian or professional groomer. 5. Provide treats and positive reinforcement throughout the process.
How Often Should A Dog’s Nails Be Clipped?
A dog’s nails should be clipped every 1-2 months to prevent them from getting too long. Regular nail trims also help maintain a healthy posture and reduce the risk of painful paw issues. Be sure to use proper tools and techniques to avoid cutting into the quick of the nail.
Where Do You Cut A Dog’s Nails Black?
Cut a dog’s nails black at the quick, the dark area inside the nail. Carefully trim a small amount at a time to avoid cutting the quick, causing bleeding, pain, and potential infection. Consult a veterinarian or professional groomer for assistance and guidance.
How Do You Trim Dog Nails Without Clippers?
You can trim your dog’s nails without clippers by filing them with a nail file or using a grinder tool. Gradually file down the nails, avoiding the quick. Be patient, use treats as positive reinforcement, and stop if your dog gets anxious or stressed.
Conclusion
Using dog nail clippers may seem intimidating at first, but with the right technique and tools, it becomes a simple task. Regular nail trimming helps maintain your dog’s health and prevents discomfort. Remember to choose the appropriate clippers and be mindful of not cutting too close to the quick.
By following these steps and understanding your dog’s comfort level, you’ll be able to confidently trim their nails in no time. Happy clipping!