In a world teeming with mass-produced pet accessories, there’s an undeniable charm and satisfaction in crafting something unique for your furry companion. Creating your dog collars and leashes allows you to personalize these essential items, ensuring both style and safety for your beloved pup. This guide will walk you through the process, from gathering materials to the final touches, empowering you to craft bespoke canine couture.
Materials You’ll Need:
- Webbing or Fabric: The foundation of your collar and leash. Opt for durable materials like nylon or polyester webbing, or explore colorful fabrics like cotton or hemp for a more unique look.
- Hardware: Essential components include a buckle, D-ring, swivel snap hook, and optionally, a slider for adjustable collars. Choose hardware that’s sturdy and proportionate to your dog’s size and breed.
- Thread and Needle or Sewing Machine: Strong thread like nylon or polyester is ideal. A sewing machine offers efficiency, but hand-stitching adds a personal touch.
- Scissors or Rotary Cutter: Sharp tools for precise cutting of webbing or fabric.
- Measuring Tape: Accurate measurements are crucial for a comfortable fit.
- Lighter or Fray Check: To prevent fraying of webbing or fabric edges.
- Decorative Elements (Optional): Ribbons, charms, or fabric paint can add personality.
Crafting a Dog Collar:
- Measure Your Dog: Measure the circumference of your dog’s neck where the collar will sit. Add a few inches for comfort and adjustability.
- Cut the Webbing: Cut the webbing to the desired length based on your measurements.
- Seal the Edges: Use a lighter or Fray Check to carefully seal the cut edges of the webbing, preventing fraying.
- Attach Hardware:
- Buckle: Slide one end of the webbing through the buckle, fold it over, and stitch it securely.
- D-ring: Attach the D-ring to the webbing near the buckle, ensuring it’s sturdy enough to hold your leash.
- Slider (Optional): If making an adjustable collar, slide the webbing through the slider before attaching the buckle.
- Decorate (Optional): Stitch or glue ribbons, charms, or other decorative elements onto the collar for a personalized touch.
- Finishing Touches: Double-check all stitching and hardware for security. Trim any loose threads.
Crafting a Dog Leash:
- Choose Your Length: Standard leash lengths range from 4 to 6 feet. Consider your dog’s size, training level, and walking environment.
- Cut the Webbing: Cut the webbing to your desired leash length.
- Seal the Edges: Seal the cut edges of the webbing to prevent fraying.
- Attach Hardware:
- Swivel Snap Hook: Attach one end of the webbing to the swivel snap hook, ensuring it’s securely stitched.
- Handle Loop: Create a loop at the other end of the leash for comfortable handling. Fold the webbing over and stitch it securely.
- Decorate (Optional): Add decorative elements to the leash for a cohesive look with the collar.
- Finishing Touches: Inspect all stitching and hardware. Trim loose threads.
Safety Considerations:
- Hardware Strength: Choose hardware rated for your dog’s weight and pulling strength.
- Comfort and Fit: Ensure the collar is snug but not too tight. You should be able to fit two fingers comfortably between the collar and your dog’s neck.
- Supervision: Always supervise your dog while wearing a new collar or leash.
- Regular Inspection: Check collars and leashes regularly for wear and tear. Replace any damaged components immediately.
Creative Ideas:
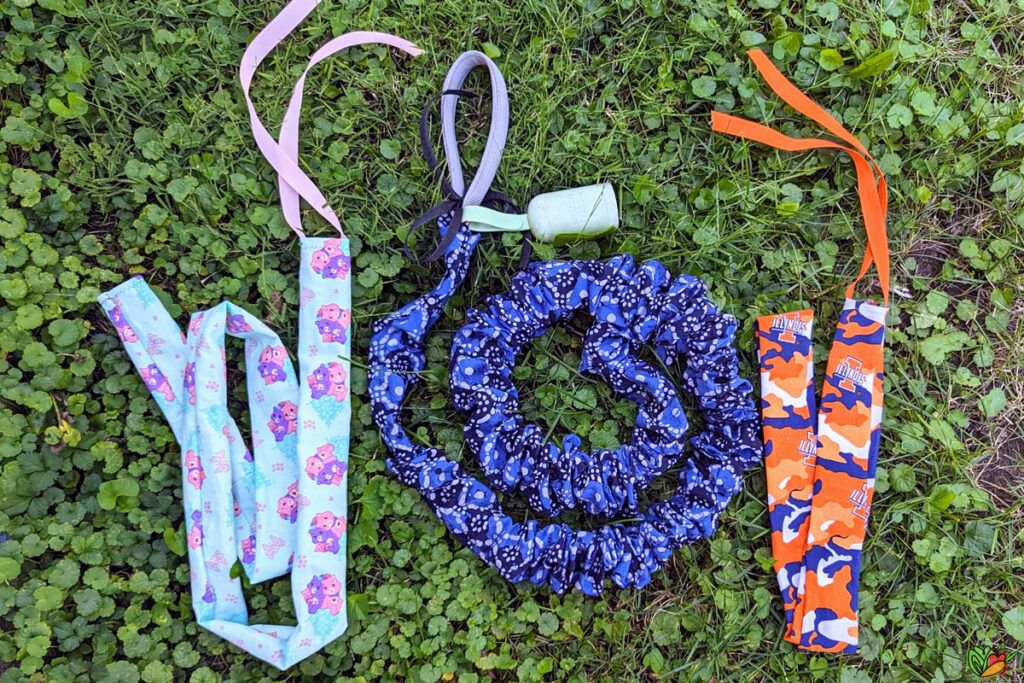
- Upcycled Materials: Repurpose old belts, fabric scraps, or even climbing rope for a unique and eco-friendly approach.
- Embroidery or Fabric Paint: Personalize your creations with your dog’s name, paw prints, or other designs.
- Reflective Elements: Enhance visibility during nighttime walks with reflective stitching or tape.
- Matching Sets: Craft coordinating collars and leashes for a stylish ensemble.
Beyond the Basics:
- Martingale Collars: Consider making a martingale collar for dogs prone to slipping out of traditional collars. This type of collar tightens gently when the dog pulls, preventing escape.
- Hands-Free Leashes: Explore hands-free leash designs that attach to your waist for convenient walking or running with your dog.
- Custom Tags: Create personalized tags with your dog’s name and contact information to complement your handmade collar.
Related: Common Mistakes to Avoid When Using Identification Collars
Conclusion:
Crafting your dog collars and leashes is a rewarding way to express your love and creativity while ensuring your furry friend’s safety and comfort. With a little practice and imagination, you can create unique accessories that reflect your dog’s personality and your sense of style. Remember, the most important aspect is to prioritize your dog’s well-being, choosing durable materials and secure hardware. So gather your supplies, unleash your creativity, and embark on this fulfilling DIY journey. Your dog will thank you with wagging tails and happy walks for years to come.