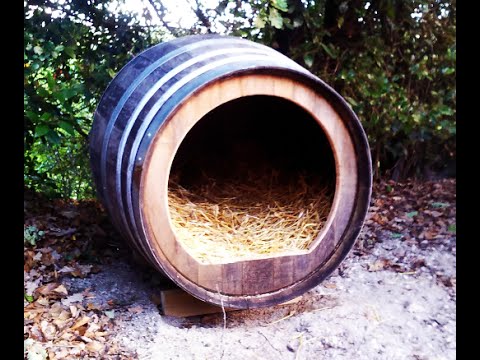
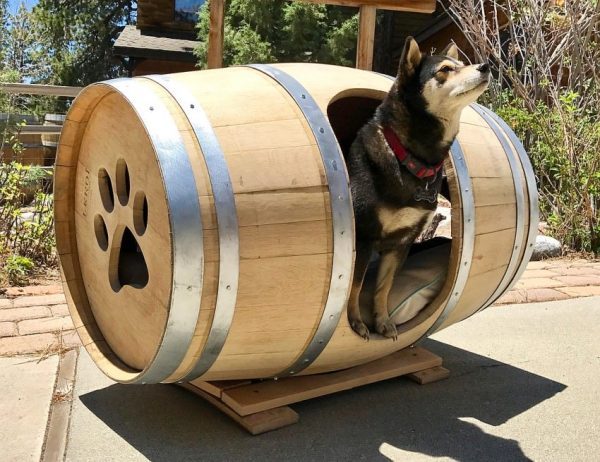
If you’re having trouble keeping your dog warm in winter, consider a DIY barrel dog house. Barrels make great dog houses because they’re inexpensive and easy to modify if they get too small or too big. This guide will show you how to insulate a barrel dog house so that it’s cozy and warm for your pup all winter long!
How to insulate a barrel dog house?
To cut a piece of plywood to fit the floor of the barrel, you’ll need to use a circular saw and either a power drill or a jigsaw. If you’re using a power drill, make sure your blade is sharp so it will cut through wood easily. If you’re using a jigsaw, have extra blades on hand in case one breaks or dulls before you’re finished cutting.
To start this step, place your plywood on top of the barrel’s floor and mark off where it needs to be trimmed down with your pencil or marker (you may need someone else’s help for this). Once that’s done, use your circular saw to trim off any excess wood from around the edges until there’s enough room between them for insulation later on in this project!
Cut a hole in the back of the barrel
Using a circular saw, cut out a circle in the center of the barrel. Make sure that your dog’s bed will fit through this opening, but don’t worry if there is some extra space around it—you can always trim it down with an electric sander later on to make everything nice and tight. If you don’t have access to any power tools, you can use a hammer and chisel to remove small chunks of wood at a time until your dog’s bed fits through perfectly.
Once you’ve got your hole cut just right, place it on top of two 2″x2″ boards (or similar pieces) that are slightly longer than the diameter of both ends combined (the ends being where we want our PVC pipes). Mark where each end meets so that when we put them together they’ll form an “X.” Then take them apart again; drill holes into each corner where they meet up; then screw them together using drywall screws so they’re sturdy enough not to fall apart when we turn our attention back towards fitting things inside later on down this step-by-step guide!
Line the inside of the barrel with spray foam insulation
Once you’ve lined the inside of your barrel with plastic, it’s time to add spray foam insulation. Spray foam is a type of insulation that expands on itself when applied, filling any gaps and creating an airtight seal. It also contains chemicals that help resist mold and mildew growth, which is a plus if you live in a humid climate or have pets that shed fur.
It’s important to know what type of spray foam to use when insulating your dog house. There are two different types: open-cell insulation and closed-cell insulation. Open-cell has more ventilation than closed-cell, making it good for large spaces like walls but not good for small spaces like windows or doors because it can allow moisture through easily. Closed-cell doesn’t have any ventilation at all (think Styrofoam), so any moisture from outside will stay outside—but this means there’s less airflow into the house as well!
Put the plywood floor into place and cover the edges
Now that your plywood floor is in place, it’s time to seal it down. I recommend using a waterproof sealant or caulk. If you don’t have any waterproof sealant, it’s easy to make some at home by mixing white glue with water until you get a consistency similar to syrup and then applying that around the edges of the plywood floor.
Now we’ll cover up all of those exposed edges with duct tape! Duct tape isn’t just for covering up holes; it can be used as an adhesive or even a sealer if needed — just wrap some around any gaps between pieces of wood, metal or plastic before affixing anything else together with screws or nails. This will prevent unwanted drafts from sneaking into your dog house and keep moisture out so that nothing gets damaged inside over time (including Fido himself!).
Slide two pieces of PVC pipe
Now that the barrel is cut, you need to slide two pieces of PVC pipe through the holes so that they stick out in opposite directions. The length of these pipes should be about 1 inch shorter than the height of your barrel, and they should be long enough to protrude from the top of your dog house (about 12-15 inches). The pipes should also be straight and not curved at all where they extend out from inside your dog house.

Build a roof
The next step is to build a roof. For this, you will need some plywood. You can buy it at any hardware store, or you can use scrap wood that you have in your garage or workshop.
Cut the plywood into pieces of varying sizes and lengths to make the roof of your barrel dog house. Use a jigsaw to cut the pieces and router to round their edges so that they look nice and smooth when covered with insulation foam later on.
Use some fancy tools and modification
You’ll need to have some tools on hand for this step, like a jigsaw, drill and hot glue gun. To cut the plywood floor out of a barrel you will likely need to use your jigsaw. The barrel should be cut in half horizontally so that you can eventually remove one half from the other half when it is time to put in your dog house walls. Make sure that you mark your cuts before using the jigsaw because cutting through wood with this tool can be tricky if you don’t know what you’re doing! Use duct tape or caulk at all edges of where two pieces of plywood connect together to make sure it is waterproof!
Once everything is dry (which could take several days), apply some finishing touches such as decorating with paint or stain, sealing with weatherproof sealant etc…
Conclusion
If you follow these steps, your dog will never have to worry about being cold again. Your new house will be ready in no time and will keep them warm all winter long!