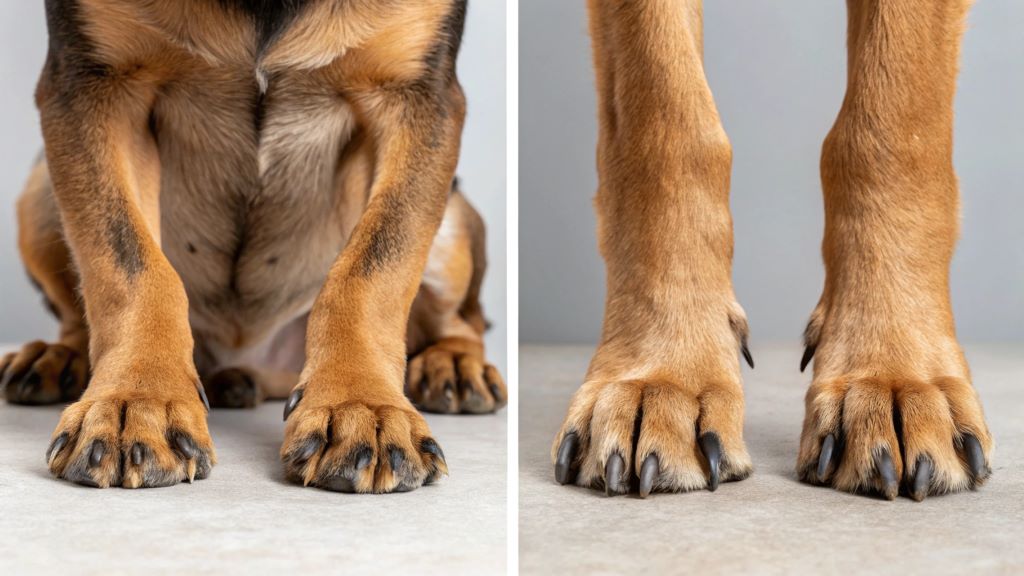
If you’ve been following the blog this week, you know that I’ve been on a mission to do more things with my dog. That’s because she’s an amazing dog who deserves more attention than I’ve given her in recent months. This week has been all about doing things with your dog, and today we tackle another topic: how to grind dog nails with a Dremel.
How to grind dog nails with Dremel?

The key to successfully grinding your dog’s nails is to keep them distracted. Remember, while you are controlling the dremel tool, they are in control of whether or not they want their nails ground.
You will need treats to distract them, so plan accordingly and make sure that you have a good supply on hand. Treats should be small enough for your dog to eat quickly, but big enough that they can’t fit into their mouths all at once (that way you don’t lose track of which piece of treat went where). A good size for most dogs is about 1/4″ in diameter and 1/8″ thick—but use whatever size works best for your dog!
Treats should also be soft enough so that if the dog bites down too hard he won’t hurt himself (not recommended), but hard enough that he doesn’t swallow it whole when he’s chewing (also not recommended). I recommend using soft and chewy treats like chicken jerky strips or freeze-dried liver cubes (my personal favorite). Just make sure whatever treat you choose has been approved by your vet as safe for dogs—more than once during this project I accidentally gave my pup an extra large chunk of rawhide due to poor planning. Once again: always check with your veterinarian before giving people food items!
Plan to have a helper on hand if this is your first time doing this task
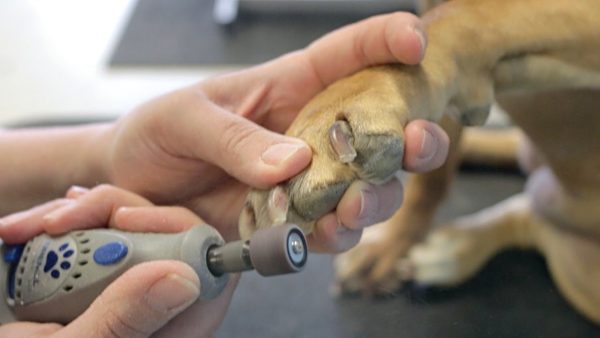
Before you begin, make sure you have a helper. It is much easier to hold the dog’s paw if someone else is there to help you out. If you are a first-timer, having an extra set of hands could be crucial—especially when it comes time to file down their nails.
If neither option is available, keep your grip on the paw as tight as possible. A good way to do so is by placing one hand under their foot and then placing your other hand over the top of both feet. This will allow for better control when filing down the nail with a Dremel tool (or any other type).
Get your dog used to having her paws handled
To make sure that your dog is comfortable with you touching her paws, try to get her used to the sensation as much as possible. Try gently holding one of her paws and giving it a gentle massage with the palm of your hand. If she seems okay with this, try repeating the process on all four paws. If she’s still nervous, try using small treats to lure her into position so that she can’t back away from you when placing a treat on top of their paw.
Once your dog has become comfortable having its feet touched, you can begin working toward trimming their nails by starting off slowly at first and gradually increasing how long each nail takes until you’re doing each nail for about 30 seconds apiece (which is what we did).
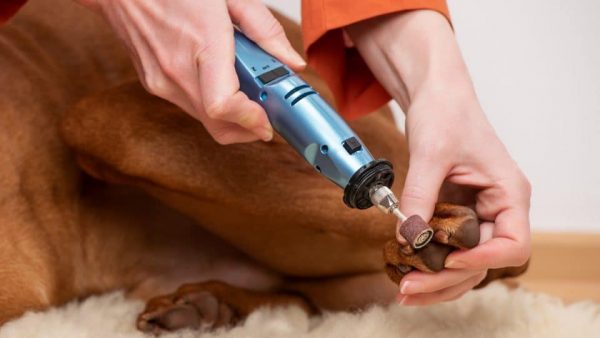
Use a pedicure tool of your choice
The first step is to get a pedicure tool of your choice. You can use clippers or any other nail file you may have to lie around the house, but we recommend using a dremel as it will be much easier to control and has softer bristles that won’t hurt your dog’s skin if they accidentally brush up against them.
Patiently work on the technique until you get it right
Patience and persistence are key to success. If you don’t feel like you’re progressing, take a break, then try again later. Don’t be afraid to ask for help from your vet or a groomer if it’s all too much for you!
Remember to be gentle and patient with your dog; do not push or force him into doing anything he doesn’t want to do.

Take your time, do it bit by bit, take breaks and use treats!
You might be tempted to just get on with it, but don’t! Take your time, do it bit by bit, take breaks and use treats!
If doing this for the first time is daunting enough as it is, try breaking it down into smaller chunks. For example: if your dog has their nails done every six months at the groomer’s, then after a few weeks of getting used to having their nails ground at home; you could start by only grinding two claws every couple of days instead of all four in one go. Once they’re comfortable with that amount of movement/attention being paid to them and their paws then you can increase the number of toes being worked on each session until eventually you’re able to complete all four properly without rushing through this process or rushing through any part of training them how to enjoy having their feet handled by humans (which is often crucial for dogs who have been abused or neglected).
Conclusion
If you’re reading this, then you are probably in a situation where you have had enough of nail trimming. I know the feeling well. I used to dread that moment when my dog would come running up to me with her paw outstretched and a pleading look on her face. She knew exactly what was going on and she wasn’t having any of it! It took me a long time before I learned how to properly groom canine nails, but now that I do (and have successfully completed over 1000 sets), I can confidently say that there is no need for anyone in your life who needs their dogs’ nails trimmed to feel intimidated by this task anymore!